
How to Fax by Web Portal
To send a fix please log in to the web portal using your login and password
(This info will be emailed to you)
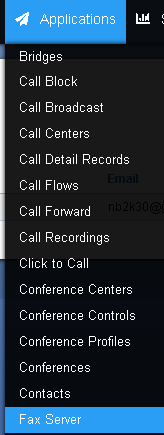
Head over to fax, under the application drop-down.

Select “NEW”
To send a proper fax it is best to fill out all fields and attach any documents.
Please see attached.
How to Fax by email
Input the following info, when composing a new email:
To: fax@peerone.ca
Subject: [out] phone number
The body of the email can be left blank or any notes
You may also attach any documents
Please see the attached image of Gmail.
PeerOne – SIP Softphone – Windows
Please click below to download
First, download Peerone softphone. Click on the download button above, open up the .exe file and install it. launch the Peerone app install and use the follow the guide below to configure the settings:
Account
- SIP server
xyz.networkplus.ca (replace xyz with your domain) - SIP proxy
xyz.networkplus.ca (replace xyz with your domain) - Username
101 (replace with yours) - Domain
xyz.networkplus.ca (replace xyz with your domain) - Login
Username for authentication. If empty, will be used Username. - Password
Your account password. - Display name
Your name, remote party will see it in incoming calls and messages.
Change Ring Tone on GRP26xx models
- Press the “Menu” button
- Navigate to “Preferences,” and then select “Sounds.”
- Select “Ring Tone”, and use the left/right keys to browse through the various ringtone options.
- Save then exit back to the home screen.
Any Desk – Remote Desktop
Please click below to download
First, download AnyDesk. Click on the download button above, open up the .exe file and it will launch the AnyDesk client. The first thing you’ll see after the client launches is a screen with your address on top. Anyone can use this address to connect to your computer.
Voice Mail
Voicemail Options
To access an extensions voicemail away from the extension.
- Dial the extension and interupt the greeting with the *star key.
| *97 | To access that extensions voicemail from the extension or the voicemail button | ||
| *98 | To access any extensions voicemail | ||
| *99[ext] | To access a specific extension voicemail | ||
| Main Menu | |
| press 5 | For advanced options |
| Advanced Options | |
| press 1 | Record a greeting |
| press 2 | Choose a greeting |
| press 3 | Record name |
| press 6 | Change password |
| press 0 | For main menu |
Porting Rejections?
Top Reasons for Ports Rejections
ADDRESS MISMATCH: The address provided for the number being ported does not match the service address on the customer’s account.
NAME MISMATCH: This rejection generally only happens with business number ports. The business name on the porting request must exactly match the name on the account.
MISSING RESELLER: ILECs (Incumbent Local Exchange Carriers – typically own the infrastructure) and CLECs (Competitive Local Exchange Carriers – establish local network interconnection with the ILECs) both sell numbers to Resellers. If the number being ported has been provided by a Reseller, the Reseller must be listed on the port request in the Reseller Name field.
For any clarification on ILECs vs CLECs vs Resellers just ask our amazing porting team. We provide you with as much information as possible via our service availability tools but, let’s be honest….it’s complicated. We are here to help!
PENDING ORDER: In most cases, “Pending Order” means there is already another change to the customer’s account in progress. It could be an address change, service change, or perhaps the customer has already issued a disconnect request on the service. It is always best to advise your customers to close their account AFTER the port has been completed.
TN NOT ACTIVE (TN = Telephone Number): The number is out of service and cannot be ported. This is usually because the current provider has suspended the account, or the customer has cancelled their number.
ACCOUNT SUSPENDED: Accounts are usually suspended for non-payment.
MRA (MORE RECENT AUTHORIZATION): This typically means that a more recent request for service has come into the losing carrier. In most cases this means the customer may have decided to go with another provider or decided to stay with their current provider.
STRANDED SERVICES: This is arguably the most frustrating rejection reason as it will require a bit of detective work on your part to find out why it happened and how to fix it. It frequently happens with business numbers that have older services, hunt groups, or traditional, fixed circuits where the customer doesn’t always know all the numbers associated with their account. A Stranded Services rejection specifically means that if the main number (typically referred to as the PILOT or BTN) is being ported, any additional lines or reserved numbers associated with that account will be stranded. The number cannot be ported until all the associated numbers on that account are accounted for and direction for each phone number, as well as the circuit, is outlined on the order (ie, port, disconnect).
What About Mobile Order Rejections?
Mobile orders have different rules from landlines. The most frequent rejections are due to “incorrect or missing account numbers”, or “no response to authorization SMS”. Here are our best tips for avoiding mobile order rejections:
ACCOUNT NUMBER IS REQUIRED: Account numbers are always required on mobile orders so get a copy of your customer’s invoice. Ensure that information is provided in your port request. Our system will require it.
IMEI REQUIRED: On the rare occasion that your client does not receive invoices but is using a “pay as you go phone”, they will need to provide you with the IMEI (the International Mobile Equipment Identity number). This number is specific to each phone and is found on the back of the battery cover.
2FA NOT AUTHORIZED/NO RESPONSE TO AUTHORIZATION SMS: Due to the influx of fraudulent activity on mobile porting, the mobile carriers implemented a ruling that customers must confirm via text that they have requested to port out their number. The customer has 90 minutes from the time they receive the text to confirm the porting, otherwise the port request is cancelled. This is for your customer’s safety and they must follow this rule in order to port their number.
Peeronevoip has implemented a process to streamline mobile orders and reduce rejections rates. Ask us how we can ensure your mobile orders are processed with no issue.
How Can I Prevent My Port From Being Rejected?
The best defence is a good offense. While you won’t prevent every rejection, you can increase your chances of a hassle-free port, by following these steps:
To reduce the chances of a customer’s residential number port being rejected:
- Obtain a copy of your customer’s latest invoice to get the correct name and address.
- Confirm that the address on the invoice is the service address for the phone number being ported. In the event, for example, that a daughter is paying her mother’s phone bill, the billing address (the daughter’s address on the invoice) will be different from the service address (the mother’s address). Your port request must contain the service address.
- Confirm with the customer that the account is active, in good standing, and that they have not recently submitted any other requests (such as an address change) to their current provider.
To reduce the chances of a customer’s business number port being rejected:
- Get a copy of your customer’s latest invoice and their equipment record. A customer can usually request a copy of their equipment record or request an RFI (Request of Information) for free. Either one will provide you with all the information you need. If you have difficulty obtaining either of these records, please reach out to the Peeronevoip LNP team to assist.
- Confirm that the address on the invoice is the service address. Your port request must include the service address and you must enter the address exactly as it appears on the invoice. You can also include the billing address in the remarks section so that the losing carrier has both addresses.
- Check the equipment record or RFI and provide direction for every number listed for the account being ported (more information is provided in the Stranded Services section above).
- Provide a copy of the customer’s invoice with your port request. This will help the LNP team identify any information which may have been overlooked, such as a Reseller name.
Remember: Not All Providers Are Created Equal
We hope this article helps you in your quest for a rejection-free port. However, since every provider has their own specific porting processes, you’ll likely get rejections that fall outside the scope of those mentioned here. When that happens, or when you have any questions regarding a port or port rejection, reach out the LNP team – we’ll help you navigate the different policies of each carrier and get your ports done.
Port Forwarding and disable ASIP LAG on the Deco
How to set up Port Forwarding and disable ASIP LAG feature on the Deco
This Article Applies to:
Port Forwarding allows you to make a device or service on your local network accessible by other devices over the internet, whilst ensuring your network remains protected.
Different services use different service ports, such as Port 80 for HTTP service, port 21 for FTP service, port 25 for SMTP service, and port 110 for POP3 service. Please verify the service port number before the configuration.
Note: Currently, some Deco models only support 16 port forwarding entries. But don’t worry since they will support up to 64 entries in the future via firmware updates.
Here we take Deco M5 as an example.
1. Launch the Deco app, tap More-> Advanced->NAT Forwarding->Port Forwarding.
2. Tap + icon at the upper right corner or click on Add Port Forwarding Rule to add a rule.
3. Choose a Service Type, type in the Service Name, and tap Internal IP to select a device you want to open ports for, then type in the External Port and Internal Port (Service Port), then click on Save to add a port forwarding rule.
If you leave the Internal Port blank, the internal ports will be the same as the external ones. For example, set up the External Port as 4500 and leave the Internal Port blank, then tap Save, and the internal port 4500 is opened.
Note: Deco does not support the feature of entering the Internal IP address manually. In a normal case, if a device connects to Deco and gets an IP address, Deco will show the device when configuring the port forwarding feature.
4. Go to the More>Internet Connection>IPv4 page to check the WAN IP address of the Deco system. Now you can try to use WAN IP:Port Number (External Port) to access the service from the outside network.
Note:
If the WAN IP address of the Deco is not a public IP address but a private IP address, that means there is another NAT device connected to the WAN Port of the main Deco, and you need to open the service ports on that device as well.
For how to verify whether the IP Address is a public one or a private one, please refer to this link:
http://en.wikipedia.org/wiki/Private_network
5. If you want to delete the port forwarding entries, please go to the More->Advanced->NAT Forwarding>Port Forwarding page, hold the entry you want to delete, then click on Delete to delete the entry.
DP752 Base Stations
Pairing Grandstream DP722 and DP730 with DP752 Base Stations
Pairing a cordless handset with a base station links the devices, allowing the cordless handset to make and receive calls. To pair a new or replacement handset:
On the DP752 Base station, press and hold the ![]() button until the light above the tick starts to flash.
button until the light above the tick starts to flash.
On the Cordless Handset, complete the following steps…
- Press the SUBSCRIBE soft key or MENU or to open the main menu
- Select the REGISTRATION
- Select the REGISTER Option
- Select BASE1
- Press SUBSCRIBE
- Phone will play an audible tone and return to home screen when completed.