
GRP261x Quick User Guide
Zoiper Mobile App
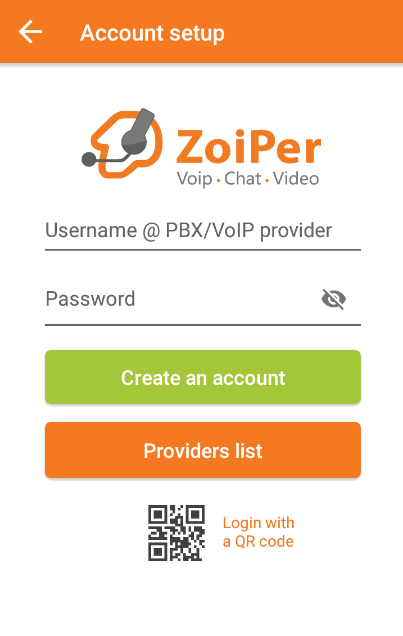
Demo testing:
1. Please download “Zoiper” for Android or IOS, using the app store
Use below login info
2. Host or provider: given by email
Password: given by email
Click ‘Create an account’,
Skip this step

Wait for the automatic configuration; try to use TCP or TLS for your SIP account.
Your account is created and ready to use!
IOS USER – Extra FYI.
Keep in mind that due to iOS limitations, it is possible for incoming calls not to work when your internet connectivity stops (out of reach for WiFi and cellular at the same time) and this continues for over 30 seconds.
(This will cause the TCP voip socket to get closed and iOS will force Zoiper to hibernate).
Zoiper will keep retrying approximately every 10 minutes and if there is network it will re-register.
The default registration expiry values are:
– UDP: 60s;
– TCP/TLS: 600s.
If you cannot use TCP or TLS because your provider or PBX does not support it, you can still try use UDP although it often causes side effects such as increased battery usage and sometimes problems with audio on other applications.
To enable it, go to Zoiper -> Settings -> Incoming calls
Enable Wi-Fi Keep alive
Enable Force background
Zoiper Windows / MAC
Demo testing:
1. Please download OEM “Zoiper” for Windows or MAC OS. Please visit: https://www.zoiper.com/en/voip-softphone/download/current
Download and install.
2. Username: 101@demo.networkplus.ca
Password: Demotest123!!!
> Click Login
3. “Select next” the url will show as “demo.networkplus.ca”
4. Skip this step (not needed)
5. Wait for a confirmation of a secure connection from our cloud pbx
Select “SIP TCP” then next
6. A “Green check mark” notifying you the sip account was successfully registered.
Select “X” icon shown below, you are now ready to make inbound and outbound calls
Groundwire – Mobile App
Configuration Details
The configuration will be done in only 3 steps. Once you have downloaded GroundWire from Google Play/Apps Store, you will need to start the application.
On the initial start up for Android, the Acrobits Groundwire App will require some rights such as access to your microphone and call information to be able to fully use this application.
Once this is done, you have to create your first SIP account. In this section, select “New SIP account”
- Title: You will be able to rename this field if you plan to use more than one account on this apps.
- Username: Your extension number given by Peerone
- Password: The password given by for the extension by Peerone
- Domain: Given by Peerone
click on the upper right “Save” button and you will be able to start using your account.
Outbound CallerID Name
Under the apps settings, click on “Accounts” then on the SIP account Click on “Advanced settings”. Scroll down to “Caller Identification” and add a display name.
Voicemail settings
Under the apps settings, click on “Accounts” then on the SIP account Click on “Advanced settings”. Scroll down to “voicemail” and add *97
#############################################################################
Activating Push Notifications on Acrobits Softphone and Groundwire for iOS
You can enable push notifications for all accounts or a specific SIP account. Enable this feature in the Incoming Call screens, and ensure the device settings allow notifications for the application.
- Decide whether to enable push notifications for all accounts or a single account:
- To set push notifications in the global Incoming Calls setting:
- Open the Keypad tab, select > Incoming Calls > Push Notifications.
- Select Done to open the Keypad tab.
- Ensure the SIP service icon is in solid green which indicates the account is registered.
- Open the Keypad tab, select
- To set push notifications in the Incoming Calls setting for a specific SIP account:
- Open the Keypad tab, select > SIP Account or Accounts.
- Select the desired account you wish to enable push notifications for incoming calls and messages.
- Select Incoming Calls.
- Select Push Notifications.
- Select Save.
- Select Back > Done.
- On the Keypad screen, ensure the SIP service icon is in solid green which indicates the account is registered.
- Open the Keypad tab, select
- To set push notifications in the global Incoming Calls setting:
- Open the device Settings screen.
- Select Notifications > Acrobits Softphone or Groundwire.
- If disabled, toggle the Allow Notifications switch to enable.
- Ensure the following options are selected:
- Banners or Alerts for the ALERTS style
Note: We recommend selecting Alerts over Banners because the behavior closely matches the expected behavior of a VoIP phone. - Sounds
- Badges
- Lock Screen.
- Banners or Alerts for the ALERTS style
You should receive push notifications for incoming calls when Acrobits Softphone or Groundwire is closed.
Call Forwarding
GRP2612/GRP2612P/GRP2612W | GRP2613
GRP2614 | GRP2615 | GRP2616
Under Menu (OK) → Phone → Call Features → Account X.
When disabled the LCD screen will look like the following figure:
When the feature is enabled, the phone’s LCD screen will show the following figure.
Add in the Phone Number or ext#, then select save.
When forwarding a call, the recipient will display a “diverted from” message.